ShotFile
Normally you take a screenshot. macOS saves it as Screenshot 2029-04-12 at 22.34.12.png and drops it on your Desktop.
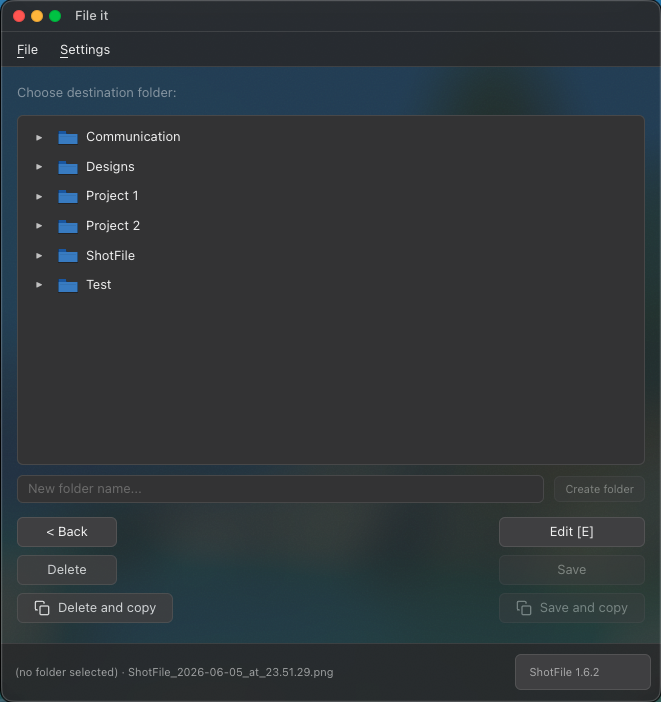
ShotFile intercepts it. You type a name, pick a folder, and it’s filed. That’s it.
If you want to annotate on the image, or add additional context to the image you can as well optionally.
It lives in your menu bar. No Dock icon. No internet. No account.
Type a clear name. Add tags like Improvement or some meta data that adds to the filename. Helps with searches afterwards and can also be used to provide context to LLM’s.
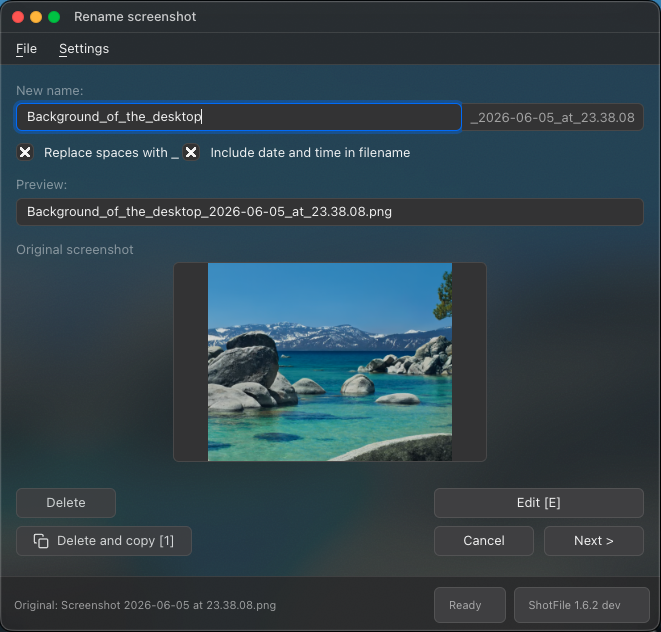
Pick a folder under your destination root. Create folders inline. Save, or save and copy to clipboard in one click.
Open the editor from the rename screen or the file screen with a single click. Annotate directly on the screenshot before filing it, or copying and deleting. Arrows, boxes, text labels, blur for sensitive content, and step-number markers. Select and modify any annotation after placing it.
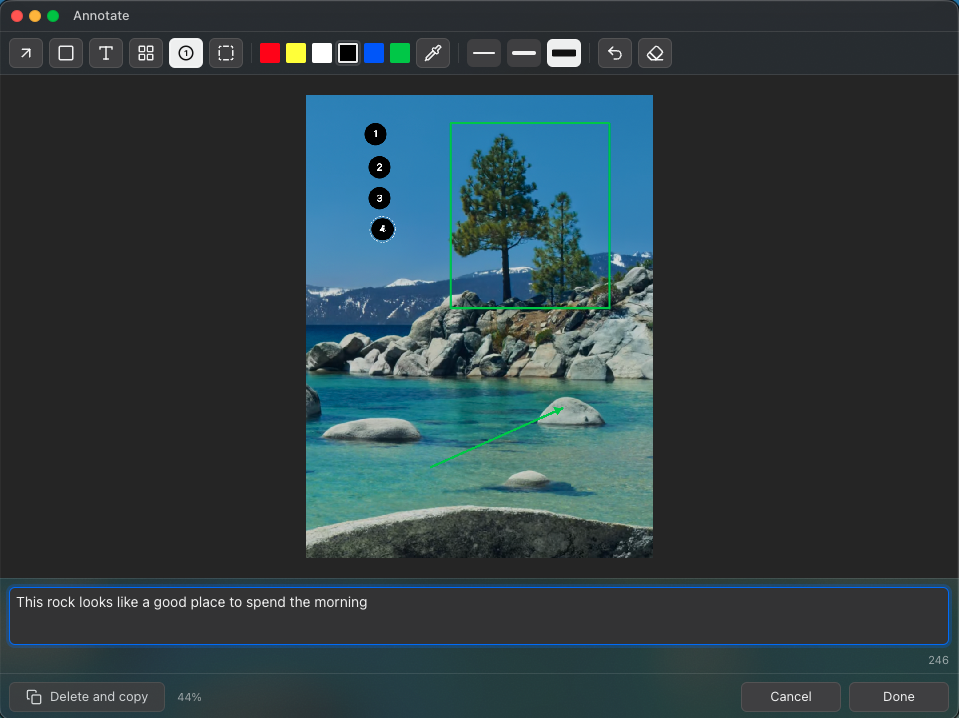
- Arrow, Box, Text, Blur, Step numbers: everything a person working on a computer needs to help inform and streamline communication.
- Select and modify: click any annotation to select it. Change colour or thickness from the toolbar. Drag to reposition. Resize with handles.
- Zoom: Cmd+scroll to zoom centred on the pointer. Precise annotation on high-resolution Retina screenshots.
- Undo, duplicate, delete: Cmd+Z, Cmd+D, Backspace. Full keyboard control.
Attach context to the image
Every shared screenshot loses its context the moment it leaves your screen. The person receiving it has to ask what it shows, what went wrong, or what you expected to happen.
ShotFile lets you write a note directly below the image before exporting. The note becomes part of the PNG: it travels with the file wherever it goes.
Drop the exported PNG straight into Cursor, Claude, or any LLM. The filename gives project and type context. The annotations show what’s wrong. The note tells it what to do. One paste, a well-formed ticket.
Example export
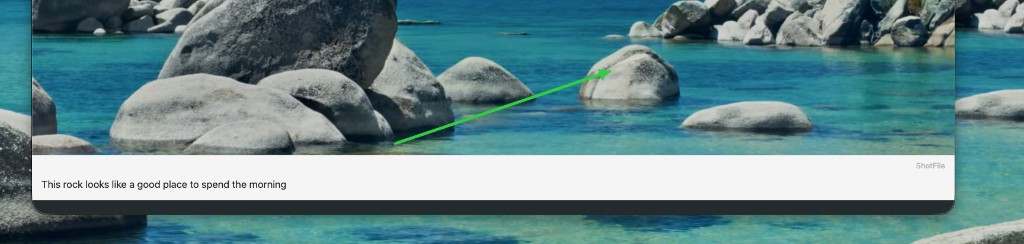
A real export: annotated screenshot plus the context bar baked into the PNG — ready to paste into a chat or where ever you like.
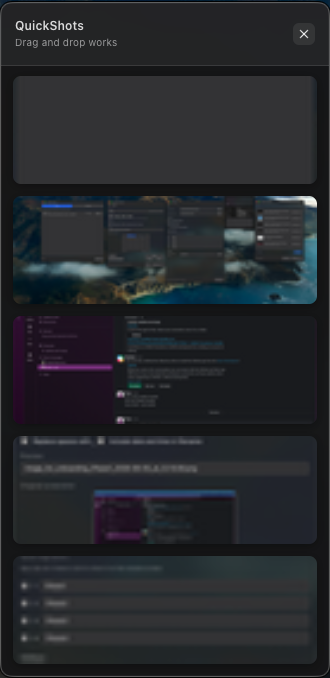
QuickShots
A small stack of your latest five screenshots for quick preview. Reopen any shot in the editor with one click, switch between them while annotate is open, or dismiss ones you do not need.
Drag shots to other apps without the stack disappearing. QuickShots can be placed anywhere for your convenience.
Recent screenshots
Your ten most recently filed screenshots in one list — open it from the menu bar camera. No Finder, no hunting.
ShotFile lives in your menu bar. Click the camera to get an overview. Each row has an eye button to open the shot in the editor, and an X to dismiss it from the list. Select any number of rows, then copy them all from the footer in one click.
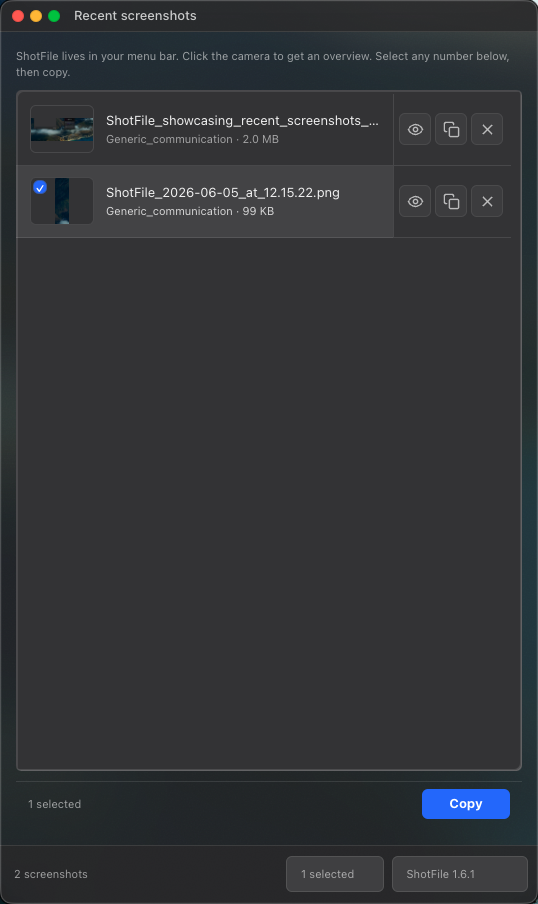
Eye opens the editor; X dismisses from the list; multi-select plus Copy at the bottom.
Clipboard history
View up to the last 10 clipboard items — images and text. Open any item in detail and copy it again.
Star favourites to keep useful snippets in a separate tab for quick access. You can modify and update these snippets.
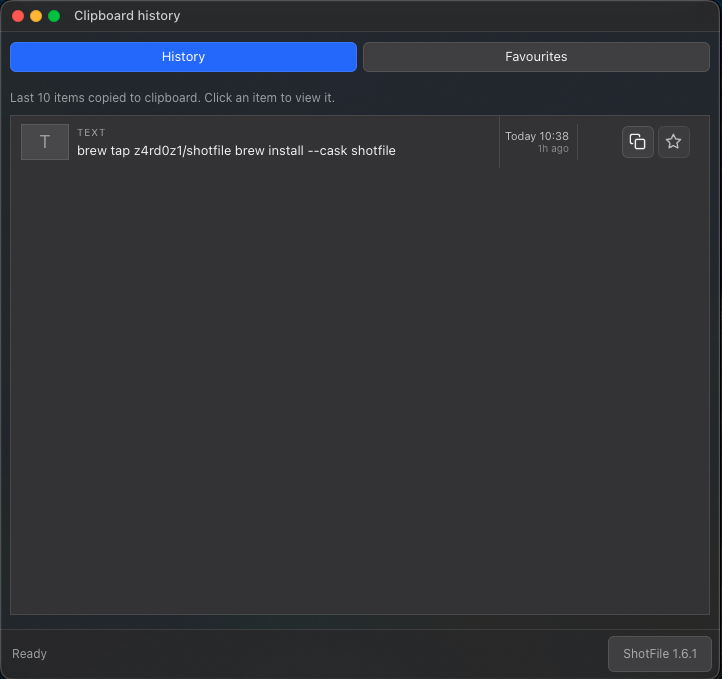
An example of previously copied text.
Everything else
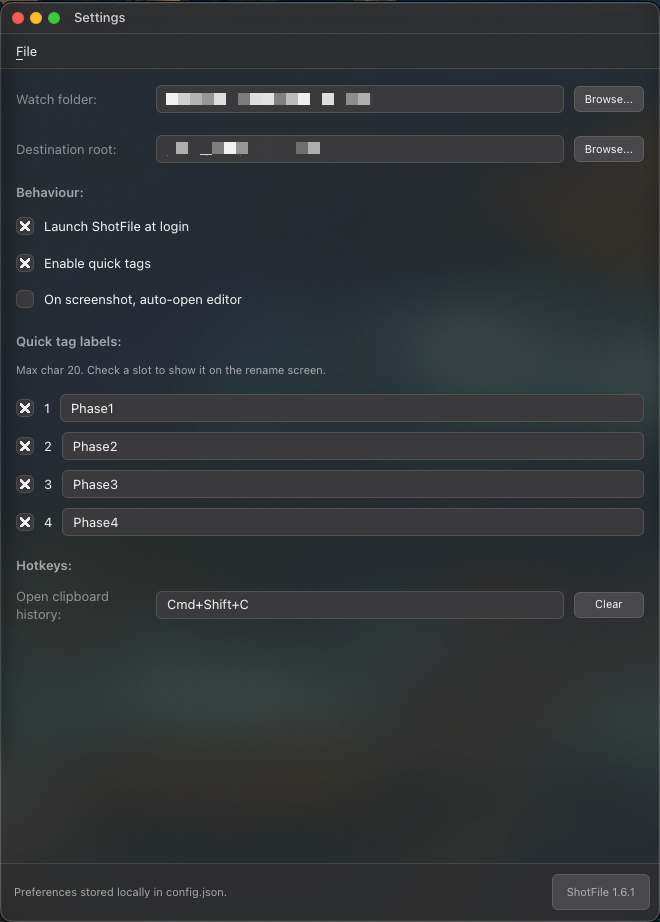
- Quick tags: one-click labels append to filenames. Useful for search, useful for dropping screenshots straight into an LLM providing the first level of context. Completely customisable.
- Copy and save: image goes to the clipboard the moment you save. Paste straight into wherever.
- Delete and copy: copy to clipboard, then delete from your Mac.
Install via Homebrew
If you have Homebrew installed:
brew tap z4rd0z1/shotfile
brew install --cask shotfile
To update: brew update && brew upgrade --cask shotfile (brew update refreshes the tap so Homebrew sees new versions). Homebrew clears macOS quarantine after install, so you should not see the “damaged” dialog.
Download
Mac only: Apple Silicon (M1 and later).
Not sure which Mac you have? Apple menu → About This Mac. If you see a Chip line, this build is for you. Intel Macs have not been sold since 2020.
Install
ShotFile is not signed by Apple. When you install from the zip, macOS will almost always show a warning — often that the app is “damaged” or from an unidentified developer. That is normal. The app is not broken. Follow every step below.
- Click the download button above. The zip saves to your Downloads folder.
- Double-click the zip, then drag
ShotFile.appintoApplications. - Open
ShotFile.appfrom Applications (double-click it, or find it with Spotlight). - macOS will block it and show a dialog. The wording varies (“damaged”, “cannot be opened”, and similar). Do not click Move to Trash. Click OK or Cancel and continue to the next step.
- Clear the block in Terminal:
- Press
Cmd+Space, typeTerminal, press Return. - Copy both lines below (
Cmd+C), paste into Terminal (Cmd+V), press Return.
xattr -cr /Applications/ShotFile.app
open /Applications/ShotFile.app
If you have not moved the app to Applications yet, use
~/Downloads/ShotFile.appin the first line instead. - Press
- ShotFile opens and sits in the menu bar.
- Press
Cmd+Shift+4and take a screenshot. The rename window should appear.
Updating
ShotFile does not auto-update. Quit the app, download the latest build, drag the new ShotFile.app into Applications (replace the old one), then run the Terminal lines in step 5 again if macOS blocks it. Your settings stay.
To find out what version you have running, open the icon and look in the menu. To find out what the latest version is, view the bottom of this page.
Questions
Why does ShotFile exist?
macOS dumps screenshots with long, identical names. That makes them hard to find later and useless for tools that read filenames. ShotFile sits in the menu bar, catches each new shot, and gives you a fast rename-and-file step so every image lands with a clear name in the right folder.
Does ShotFile send anything to the internet?
No. The Mac app watches a folder on your disk and moves files you point at. It does not phone home, sync to a cloud, or upload screenshots.
Where does it put renamed screenshots?
By default, ~/Screenshots/. You can change the watch folder and destination root in Settings.
Why only one download? What about Intel Macs?
Apple has not sold new Intel Macs since 2020. The Apple Silicon build is the right download for almost everyone today (M1, M2, M3, M4). If About This Mac shows an Intel processor, you need a separate Intel build. Check the download page for your version if an Intel file is listed.
Why is there no Apple notarization stamp?
Notarization requires an annual Apple developer fee. This release is unsigned. That is why macOS shows the warning during install (see step 5 in Install above).